Android 内核编译模拟
环境配置
硬件配置
64GB内存
工具
- aosp
- android-kernel
- Android Studio
- adb 等 android-tools
1 | sudo apt-get install git-core gnupg flex bison build-essential zip curl zlib1g-dev libc6-dev-i386 x11proto-core-dev libx11-dev lib32z1-dev libgl1-mesa-dev libxml2-utils xsltproc unzip fontconfig rsync |
1 | export REPO=$(mktemp /tmp/repo.XXXXXXXXX) |
AOSP
安装源码
1 | you need to git config --global YourEmail & Name first |
构建
1 | source build/envsetup.sh |
Android Kernel
安装源码
1 | repo init -u https://mirrors.tuna.tsinghua.edu.cn/git/AOSP/kernel/manifest -b android-gs-raviole-5.10-android12-d1 |
好像没有 common 目录,(不同版本结构不同)
编译
模拟器
Android 11 后 GKI 内核编译方法:
1 | kernel |
对于 Android 12 模拟器内核编译:
1 | BUILD_CONFIG=common-modules/virtual-device/build.config.virtual_device.x86_64 build/build.sh |
对于 Android 13 后引入的 bazel 方法编译模拟器内核:
1 | tools/bazel run //common-modules/virtual-device:virtual_device_x86_64_dist [-- --destdir=$DIST_DIR] |
自定义内核配置编译
Cuttlefish
Cuttlefish 为测试 build 的模拟器
1 | git clone https://github.com/google/android-cuttlefish |
bazel 安装需要修改代理:https://github.com/bazelbuild/bazel/issues/23492
编译好后即可安装:
1 | sudo apt install ./cuttlefish-base_*.deb ./cuttlefish-user_*.deb |
模拟已有设备
访问 google 已编译发布的内核:
https://ci.android.com/builds/branches/aosp-android-latest-release/grid?legacy=1
选择其中 aosp_cf_x86_64_only_phone 最新 build 下载
下载 aosp_cf_x86_64_only_phone-img-14654133.zip 和 cvd_host_package.tar.gz 两个包。
然后执行以下命令:
1 | mkdir cf |
然后运行 HOME=$PWD ./bin/launch_cvd --daemon 即可
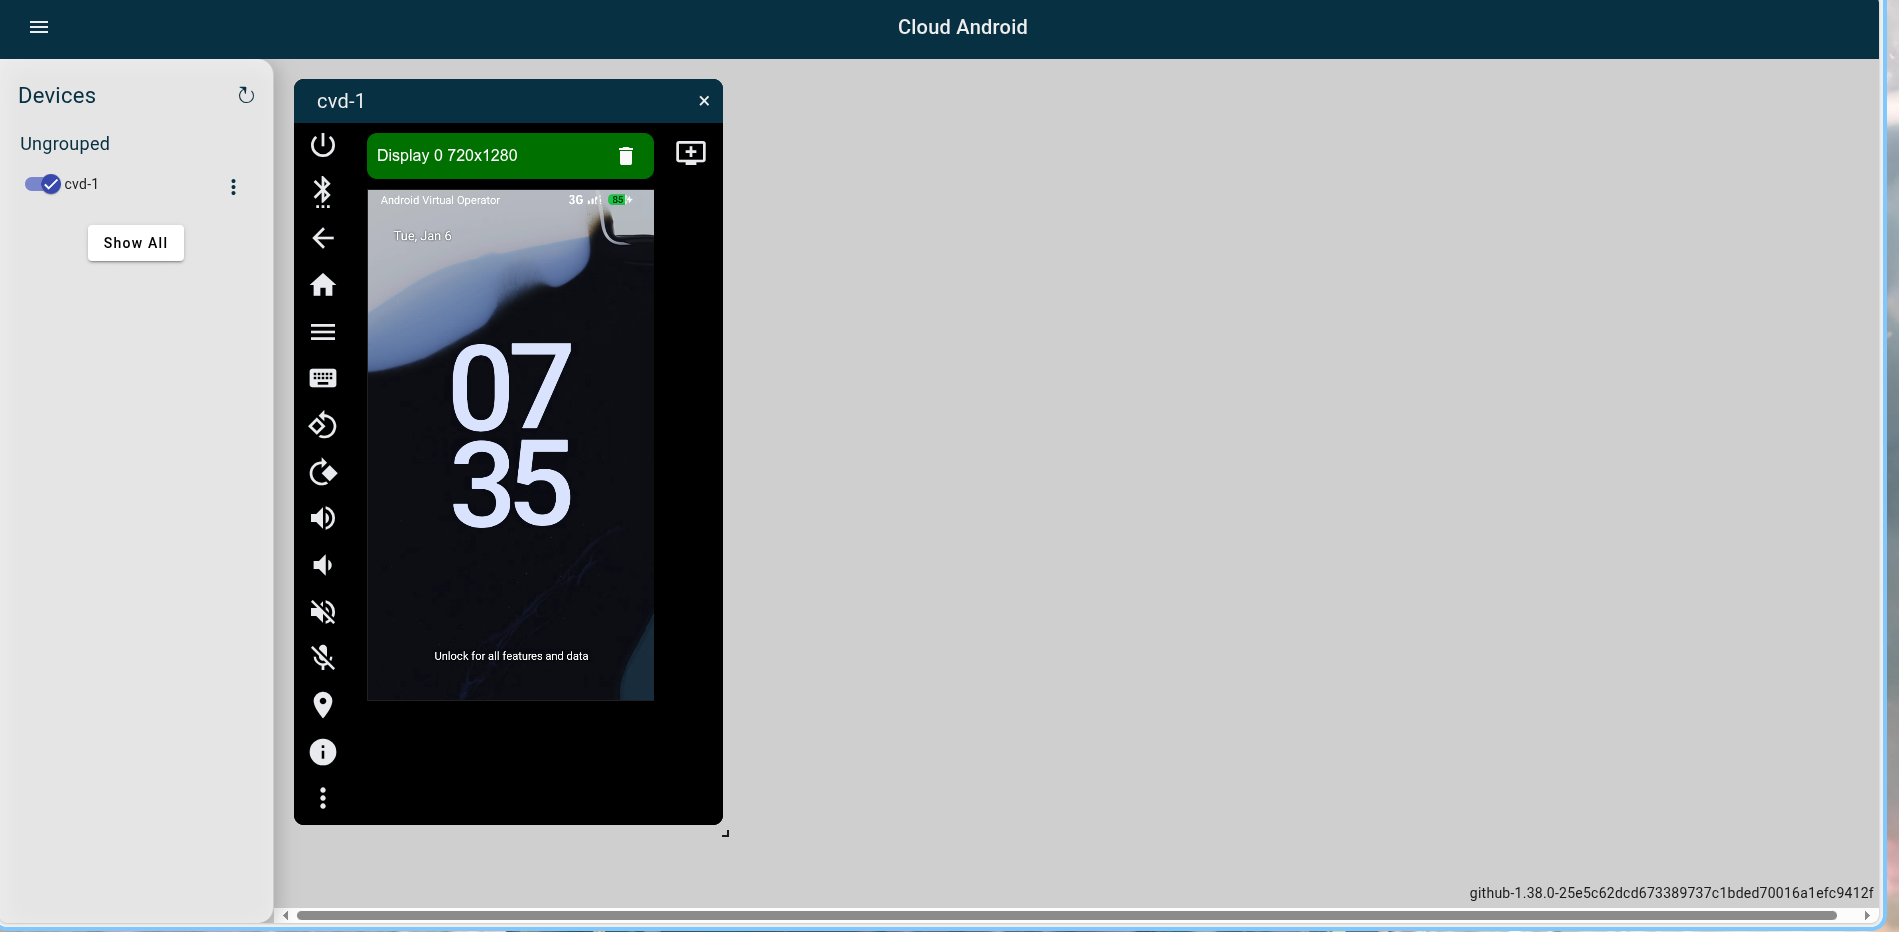
访问 https://<host-ip>:8443 即可管理安卓设备。
感觉这个比 android emulator 更高级一些,同时应该支持跨架构模拟,需要进一步研究一下。
跨架构模拟只需要在下载 artifacts 的时候下载 cvd-host_package-x86_64.tar.gz 即可。yy
启动自定义内核
开发自定义内核
似乎是 android-kernel 编译好后直接使用以下命令即可
1 | cvd create \ |
漏洞复现
Badspin
参考链接
本博客所有文章除特别声明外,均采用 CC BY-NC-SA 4.0 许可协议。转载请注明来源 Small Utopia!
评论