P2IM论文复现
导师说要多实践,因此将看过的P2IM论文进行复现,同时对源码进行简单查看。
看网上并没有相关的复现教程,因此写下该博客
链接: https://github.com/RiS3-Lab/p2im
1. 环境
Ubuntu 16.04 !!!(重中之重!其他版本可能不成功)
GNU Arm Embedded Toolchain:https://developer.arm.com/downloads/-/gnu-rm
fuzz target: https://github.com/RiS3-Lab/p2im-real_firmware/tree/d4c7456574ce2c2ed038e6f14fea8e3142b3c1f7/binary
2. 过程
-
首先下载p2im源码
git clone https://github.com/RiS3-Lab/p2im.git cd p2im -
下载子项目
# submodules are cloned into externals/ git submodule update --init git submodule update --remote -
下载并解压GNU Arm Embedded Toolchain,并且将其内/bin目录添加到环境变量
-
编译AFL,ubuntu16.04测试没有问题,ubuntu22.04不行
# Compile AFL make -C afl/ -
Qemu已经在项目里预编译好了,不需要额外配置
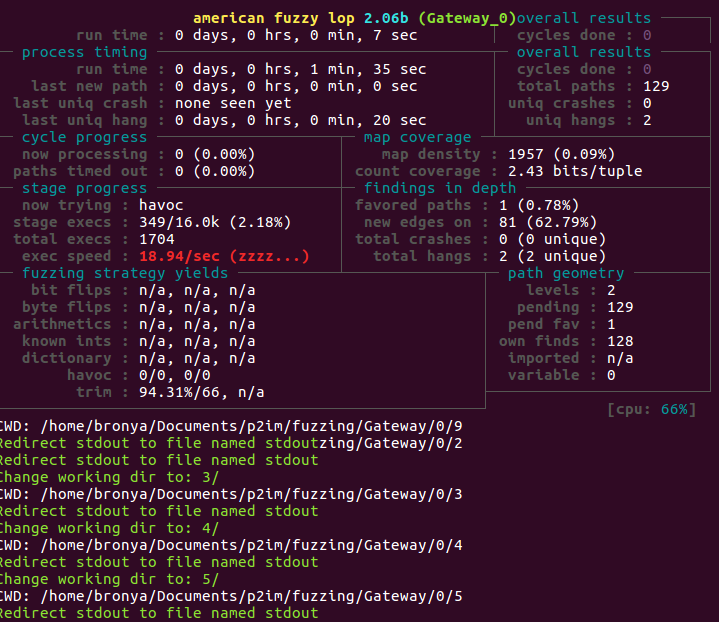
3. Fuzzing
-
确定工作区
WORKING_DIR=<repo_path>/fuzzing/<firmware_name>/<fuzzing_run_num>/ mkdir -p ${WORKING_DIR} cd ${WORKING_DIR} -
将输入seed文件复制到工作区/inputs文件夹下
# Copy the "random" seed to the working directory cp -r <repo_path>/fuzzing/templates/seeds/ ${WORKING_DIR}/inputs -
将配置文件fuzz.cfg.template文件复制到工作区下,注意:文件名和内容需要根据修改!要把文件内<>的内容改为实际绝对地址
# Copy the template to the working directory cp <repo_path>/fuzzing/templates/fuzz.cfg.template fuzz.cfg -
开始fuzz
<repo_path>/model_instantiation/fuzz.py -c fuzz.cfg难绷,还是报错。。。不知道是哪儿的问题。。。
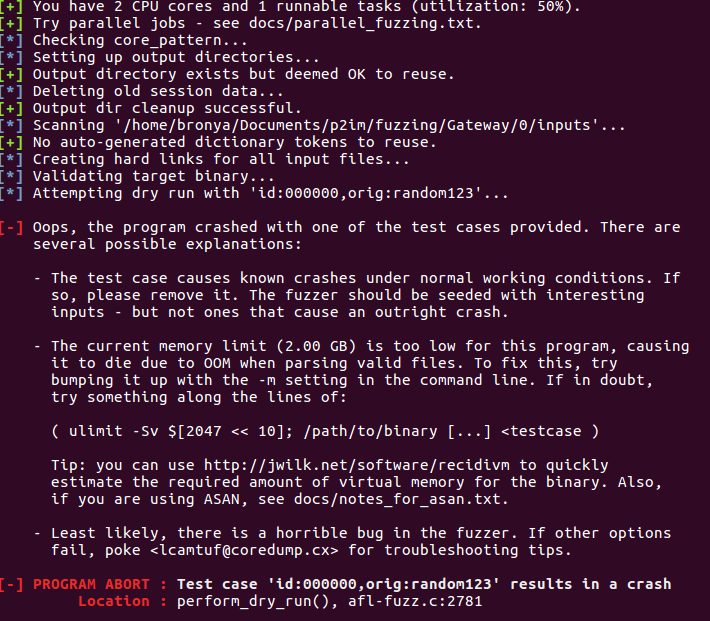
又试了几次,其中把报错上面的命令又跑了跑,再运行发现就可以了。。。